Supply Demand Dashboard
- What is Supply Demand Dashboard?
Supply Demand Dashboard for Tradingview has several features that can help traders identify supply and demand zones in the market. These zones are important because they can serve as turning points in the market, which can be used as entry and exit points for trades. The purchase will provide access to 2 dashboards: MTF (multi-timeframes) for scanning timeframes and MTS (multi-symbols) for scanning symbols.
- Multi-symbol and timeframe scanning: The dashboard can scan up to 10 different symbols and 7 different timeframes for these zones. This allows traders to identify potential supply and demand imbalances across a variety of markets and time horizons, helping them to get a more comprehensive view of potential trading opportunities.
- Stop loss and take profit suggestions: Once a zone is found, the dashboard will show you suggestions on where to place your stop loss and take profit orders. This can be helpful for traders who are new to supply and demand trading or who are looking for confirmation on their own placement ideas.
- Visual representation of supply and demand zones: The indicator will also display a dashboard on your chart where you can see exactly what supply demand zone has recently formed on multiple symbols or timeframes. This visual representation can help traders to better understand the context of the zones and how they may be interacting with each other.
- Alerts for new zones: You can also receive alerts (sound, visual, pop-up, email) as soon as a new zone has formed. This can be helpful for traders who want to be notified of potential trading opportunities as soon as they arise.
- Customizable scanning: The indicator allows you to specify which symbols and timeframes you want to scan. This allows traders to tailor the indicator to their own trading style and preferences.
Overall, the Supply Demand Dashboard for Tradingview is a comprehensive tool that can help traders of all experience levels identify and trade supply and demand zones.
- Indicator settings:
MTS Dashboard:
Symbol 1-10: pick 10 symbols that you would like the dashboard to scan
Show weak zone/untested zone/turncoat zone tickboxes: select to display those zones on the chart.
Zone fuzz factor: adjusts how strictly supply and demand zones drawn, with a higher factor making the zone wider and vice versa.
Fractal fast/slow factor: changes the sensitivity of fractals for calculating the Supply/Resistance zones. No need to change it unless you want to test the calculations of the zones.
Various Color settings: customize the colors and display of texts to your visual preference.
ATR period for SL shift: the timeframe used to calculate the Average True Range for adjusting stop loss levels.
SL shift coefficient: a multiplier used with the ATR value to adjust stop loss levels according to market volatility.
TP coefficient (from SL): a multiplier determining the Take Profit level relative to the Stop Loss distance.
Max bars to calculate: the maximum count of past candlesticks considered by the indicator for its analysis.
Alert for dashboard symbols/chart symbols tickboxes: select to enable alert notification of the indicator.
MTF Dashboard:
Timeframe 1-7: pick 7 timeframes that you would like the dashboard to scan
Other settings are similar to MTS Dashboard.
- Alert set-up:
To stay updated on potential trading opportunities, you can set up alerts within the Supply Demand Dashboard settings.
Step 1: From the indicator settings, customize your alerts by defining your desired parameters for buy and sell signals. The selected configurations will be used for notifications in Step 2.

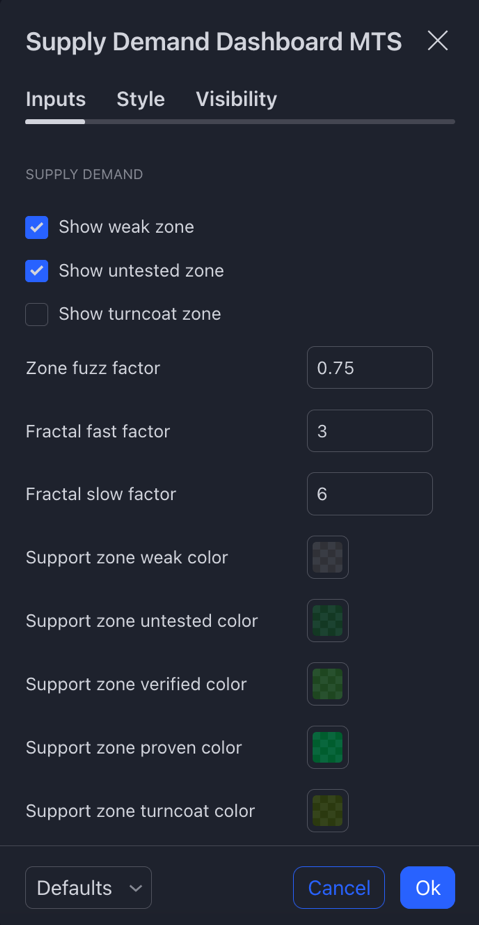


Settings panel for MTS

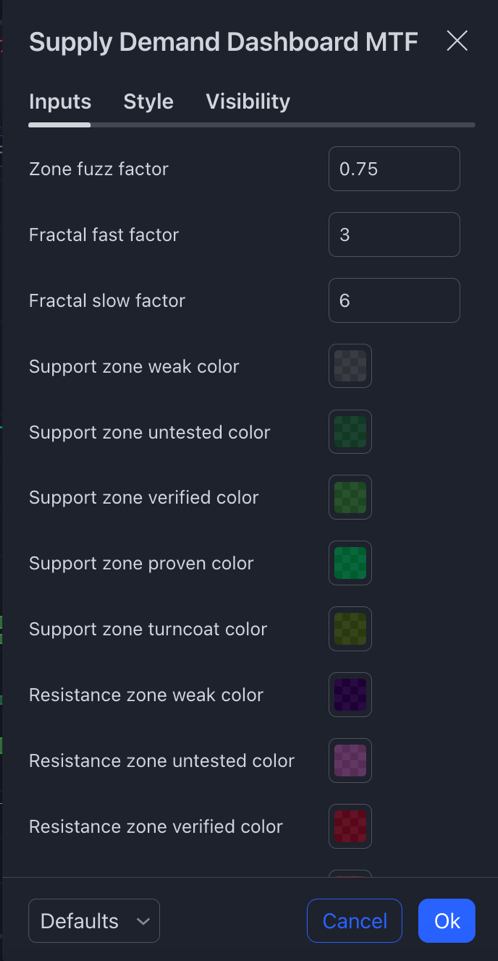
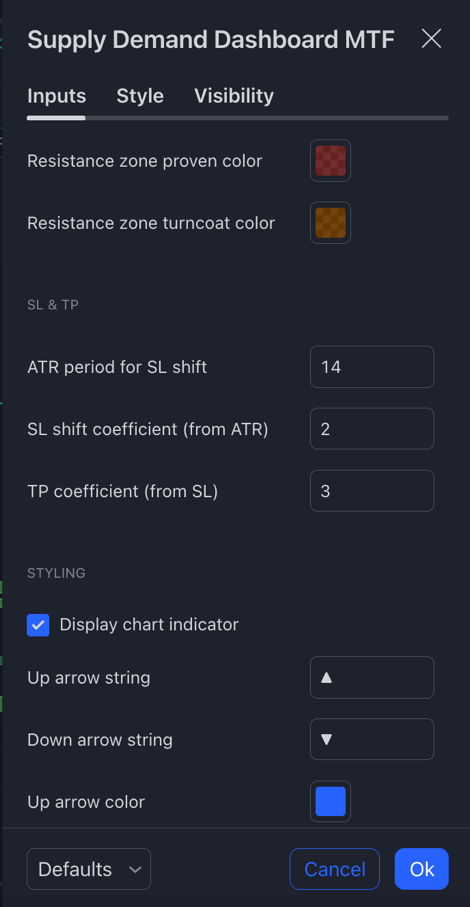


Settings panel for MTF
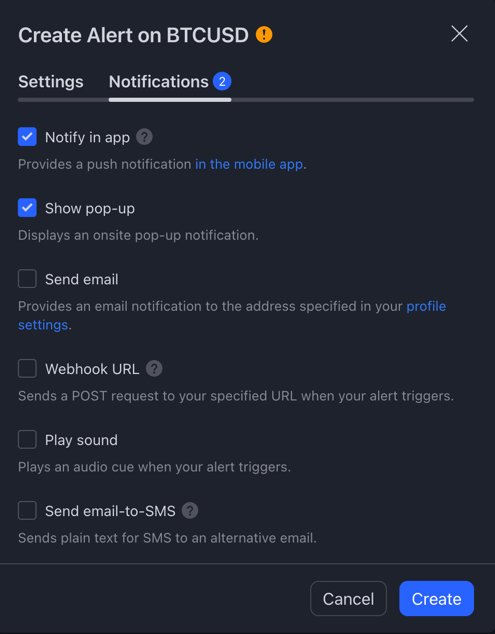
Step 2: To receive notifications through the app, pop-ups, alert emails, Webhook URL, sound alerts, or email-to-SMS, enable these features by clicking on TradingView's Alert icon.

Step 3: Select Supply Demand Dashboard MTS or MTS from the “Condition” dropdown list

Step 4: A pop-up will appear as follows. Click on “Notifications”.
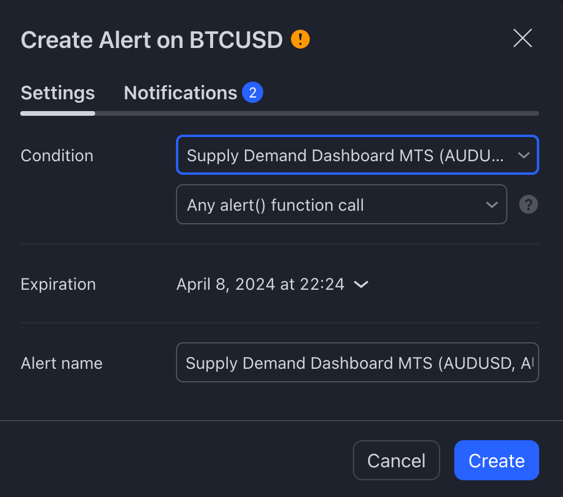

Step 5: Choose the types of notifications you'd like to receive, and click the “Create” button.